EasyAuth easy set-up
Nov 27, 2025 • Thyge S. Steffensen
Tags:
I had some trouble figuring out how to enable EasyAuth and controlling which users/applications that could access the “EasyAuth’ed” “app”.
I was following this guide from Microsoft, which was a bit outdated and when finished, every User in my tenant could access my site and no application could access it. Better than every one ^.^
Following this guide, will:
- Enable Easy Auth for a Container App.
- Limit which users can access the Container App.
- Limit which applications can access the Container App.
In other words, give explicit access to users and/or applications to access a Container App. Notice that, Easy Auth is a all or nothing setup – either you can access the app or you cannot. If you want granulated control, for example to have a home page open or expose API which have individual access requirements - I would use something like Authentication and Authorization in ASP.NET Web API.
Without testing, this guide might also work for App Services and Logic Apps, where “EasyAuth” is also availible.
Spin up a container app
Instead of applying this in your current setup, I would follow it and apply it to the real set-up afterwards - to get familiar with it all.
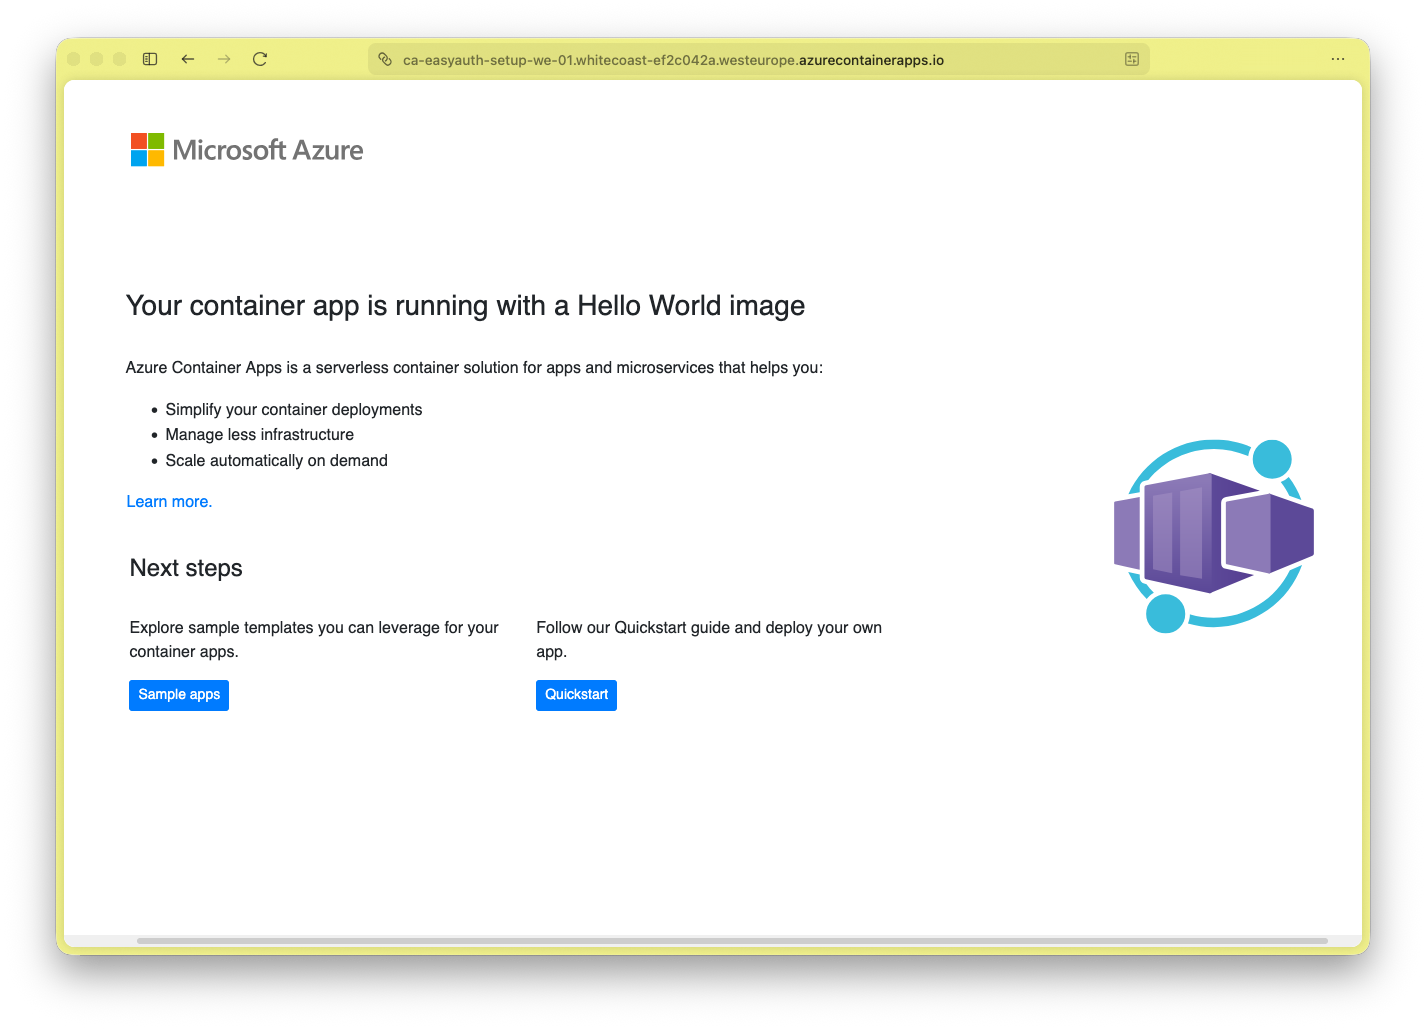
Let’s start by spinning up container app using the ‘Quick start image’ or mcr.microsoft.com/azuredocs/containerapps-helloworld:latest and remember to enable ‘Ingress’ from everywhere.
Et voila - we got a site which we can access and the following url yields:
And this simple .NET Console App:
var httpClient = new HttpClient();
var resp  = await httpClient.GetAsync("https://ca-easyauth-setup-we-01.whitecoast-ef2c042a.westeurope.azurecontainerapps.io/");
Console.WriteLine(resp.StatusCode);
will output:
$ dotnet run
OK
So far, we have a Container App - which everybody can access. Not good for a non-public API ;)
Create an App Registration (Container App)
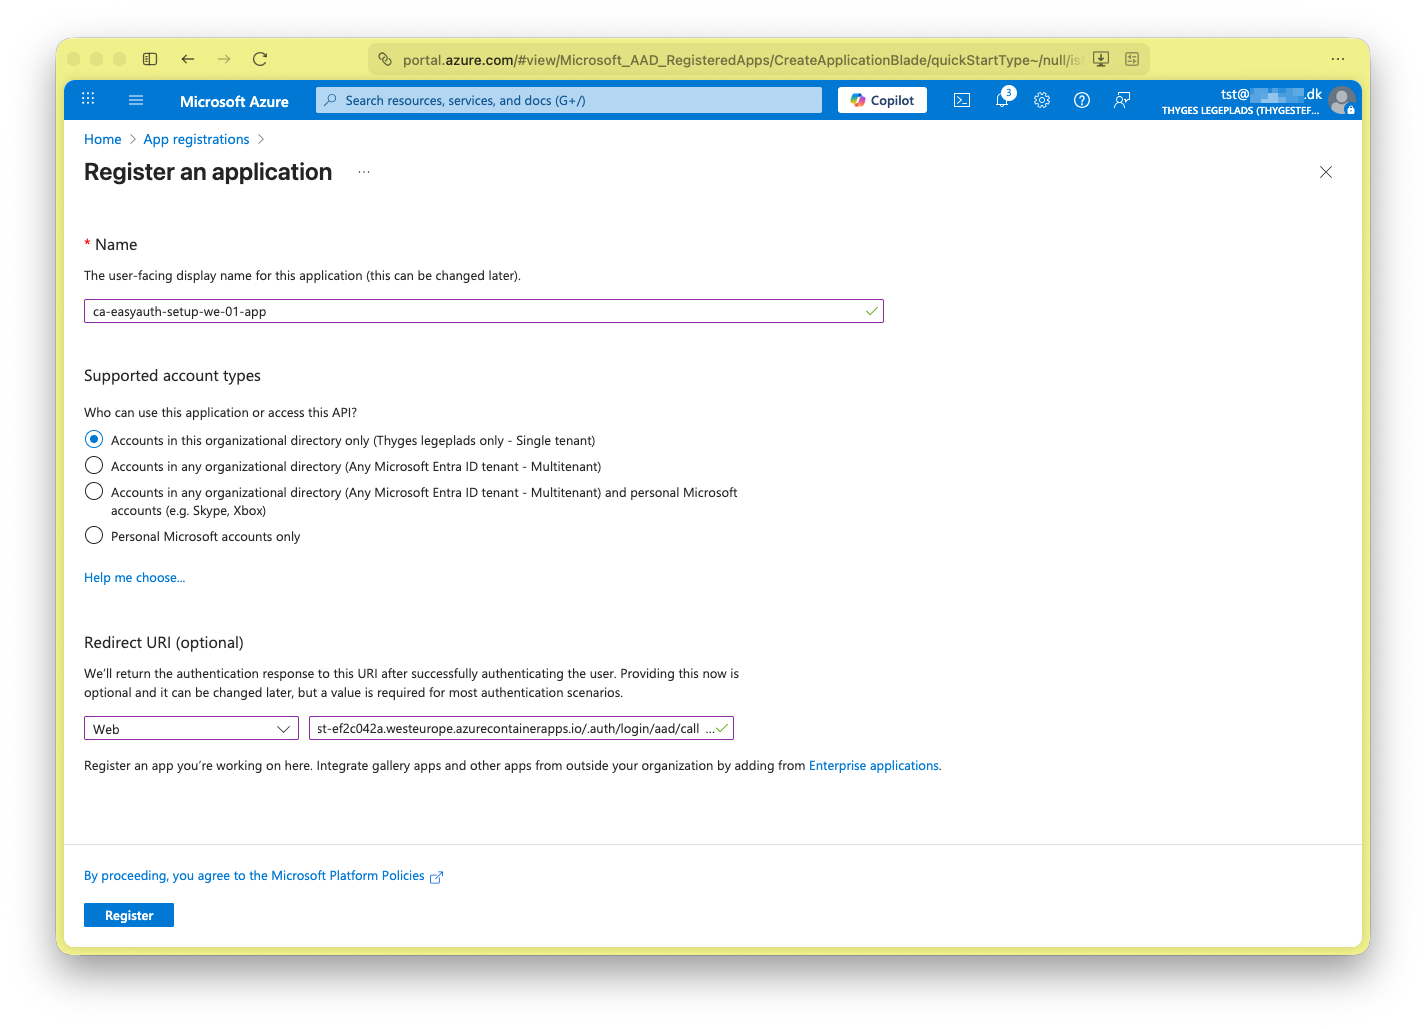
- Let’s create a ‘App Registration’ representing the ‘Container App’.
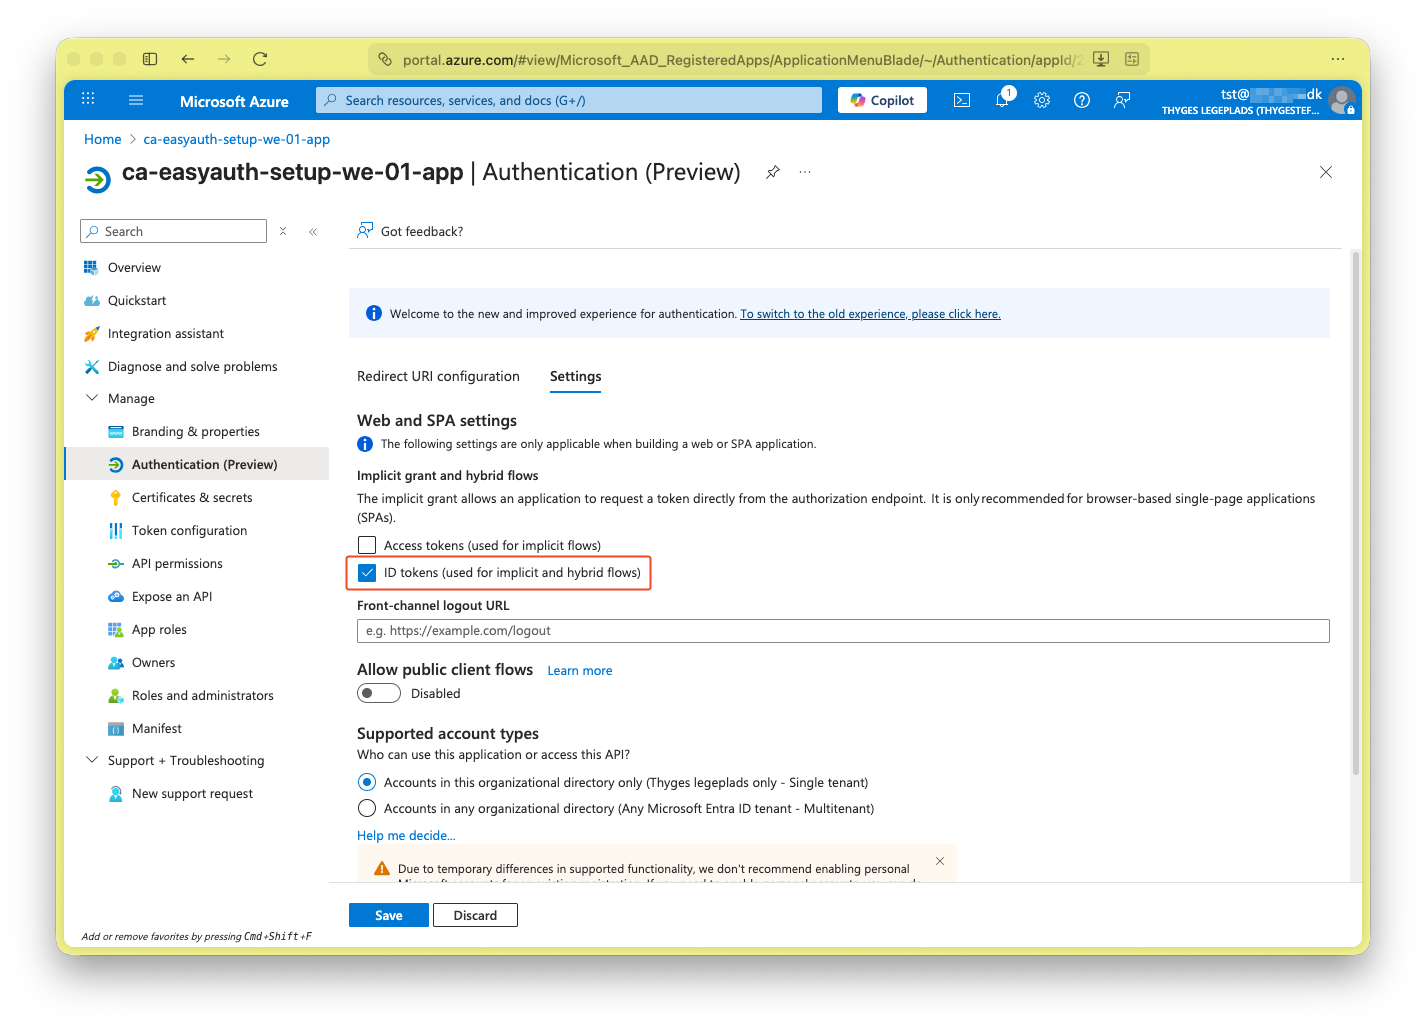
- Go to ‘Manage > Authentication (Preview)’ and under the ‘Settings’ tab, enable ‘ID tokens (used for implicit and hybrid flows)’.
- Go to ‘Manage > Expose an API’ and add ‘Application ID URI’
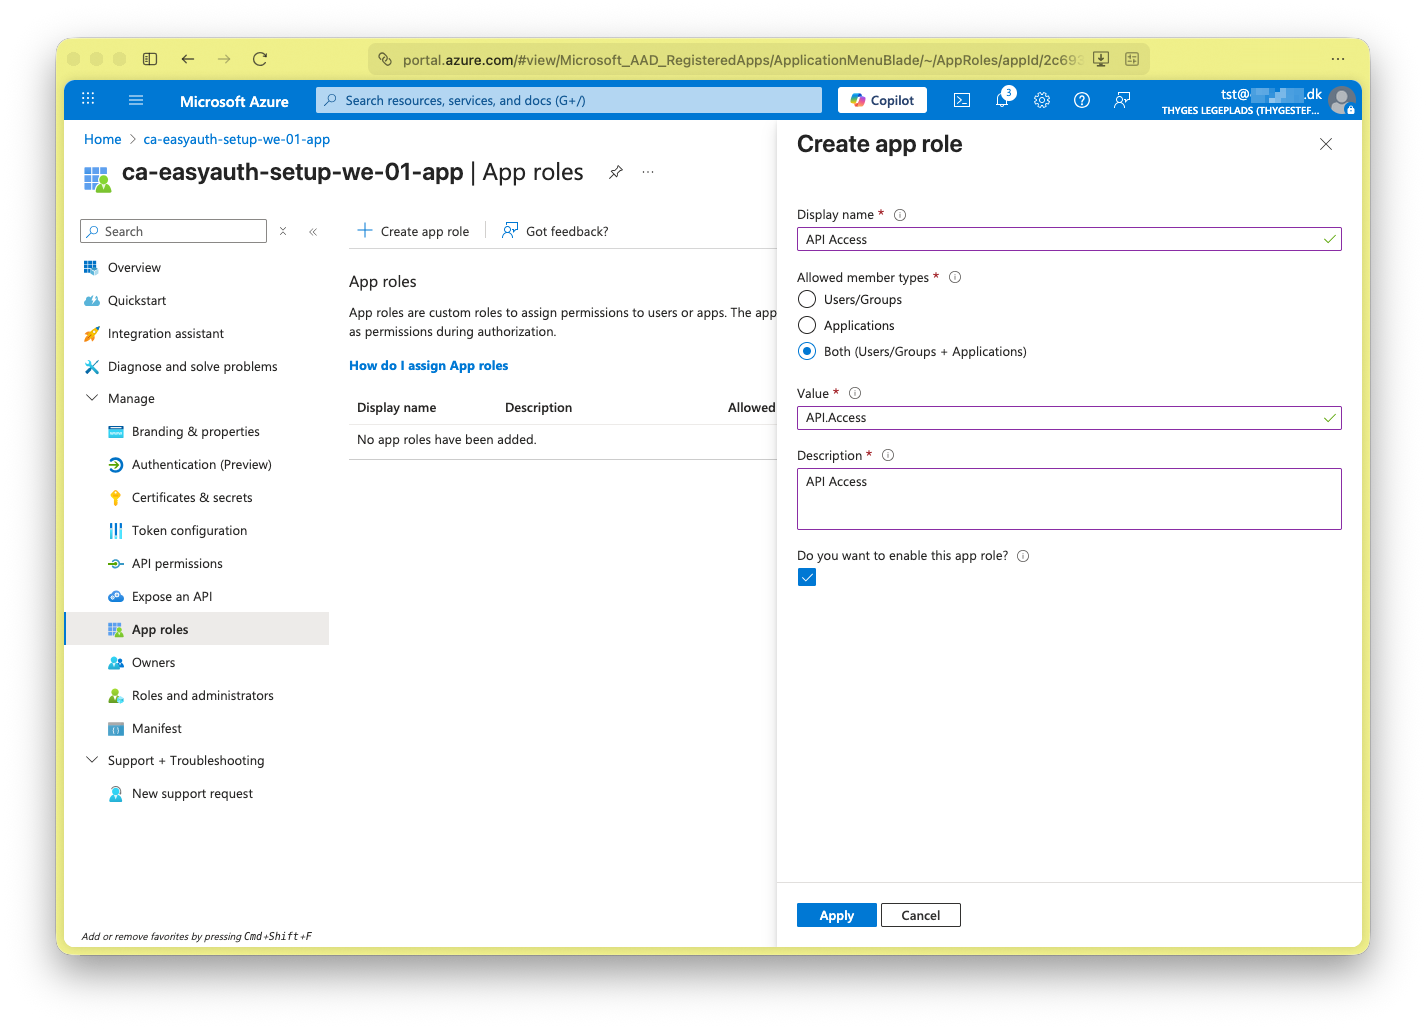
- Go to ‘Manage > App roles’ and add ‘Create app role’, give it a name and select ‘Both’.
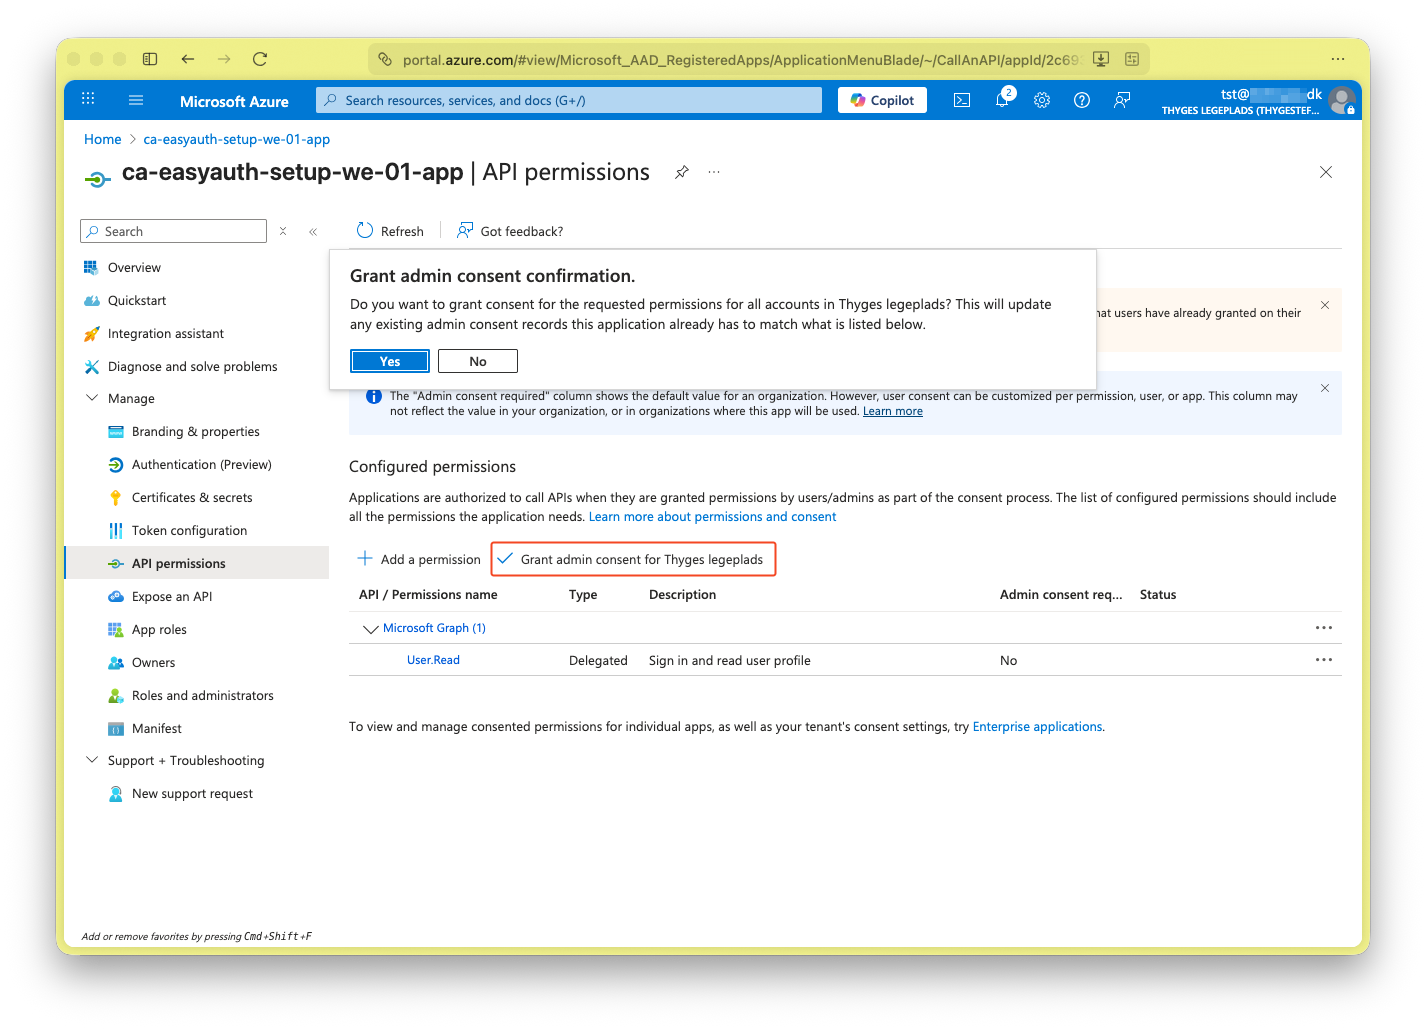
- Go to ‘Manage > API permissions’ and grant ‘Microsoft Graph (1) > User.Read’
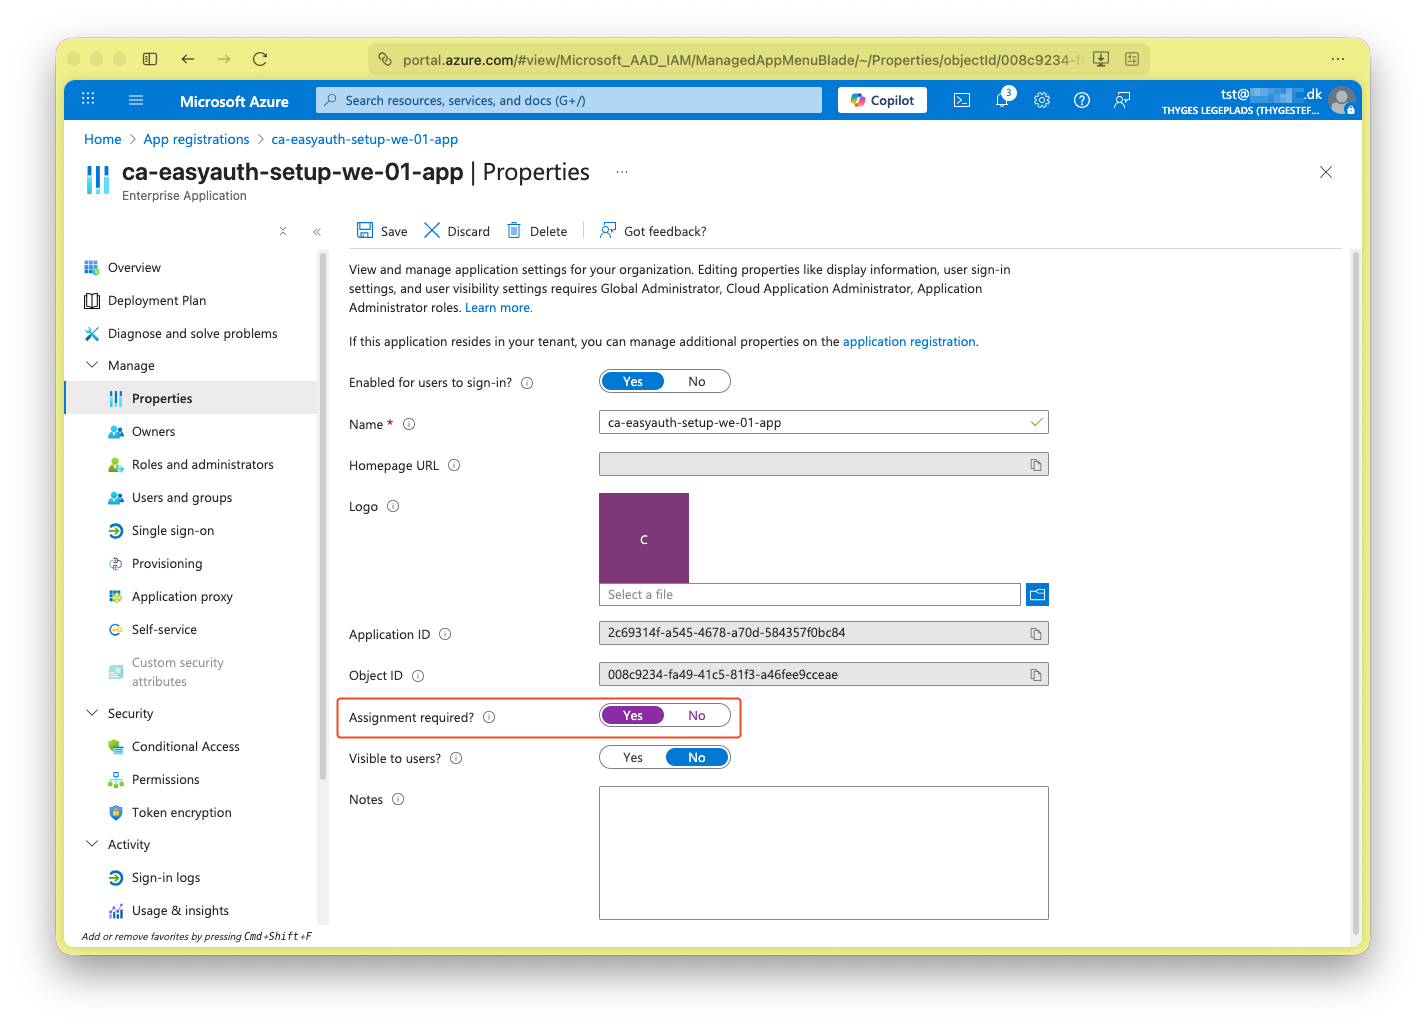
- Go to ‘Overview’ and access the underlaying ‘Managed application in local directory’.
- In the ‘Enterprise Application’ go to ‘Manage > Properties’ and enable ‘Assignment required?’. This will block internal users access.
Configure Easy Auth
- Go back to the ‘Container App’.
- Go to ‘Security > Authentication’.
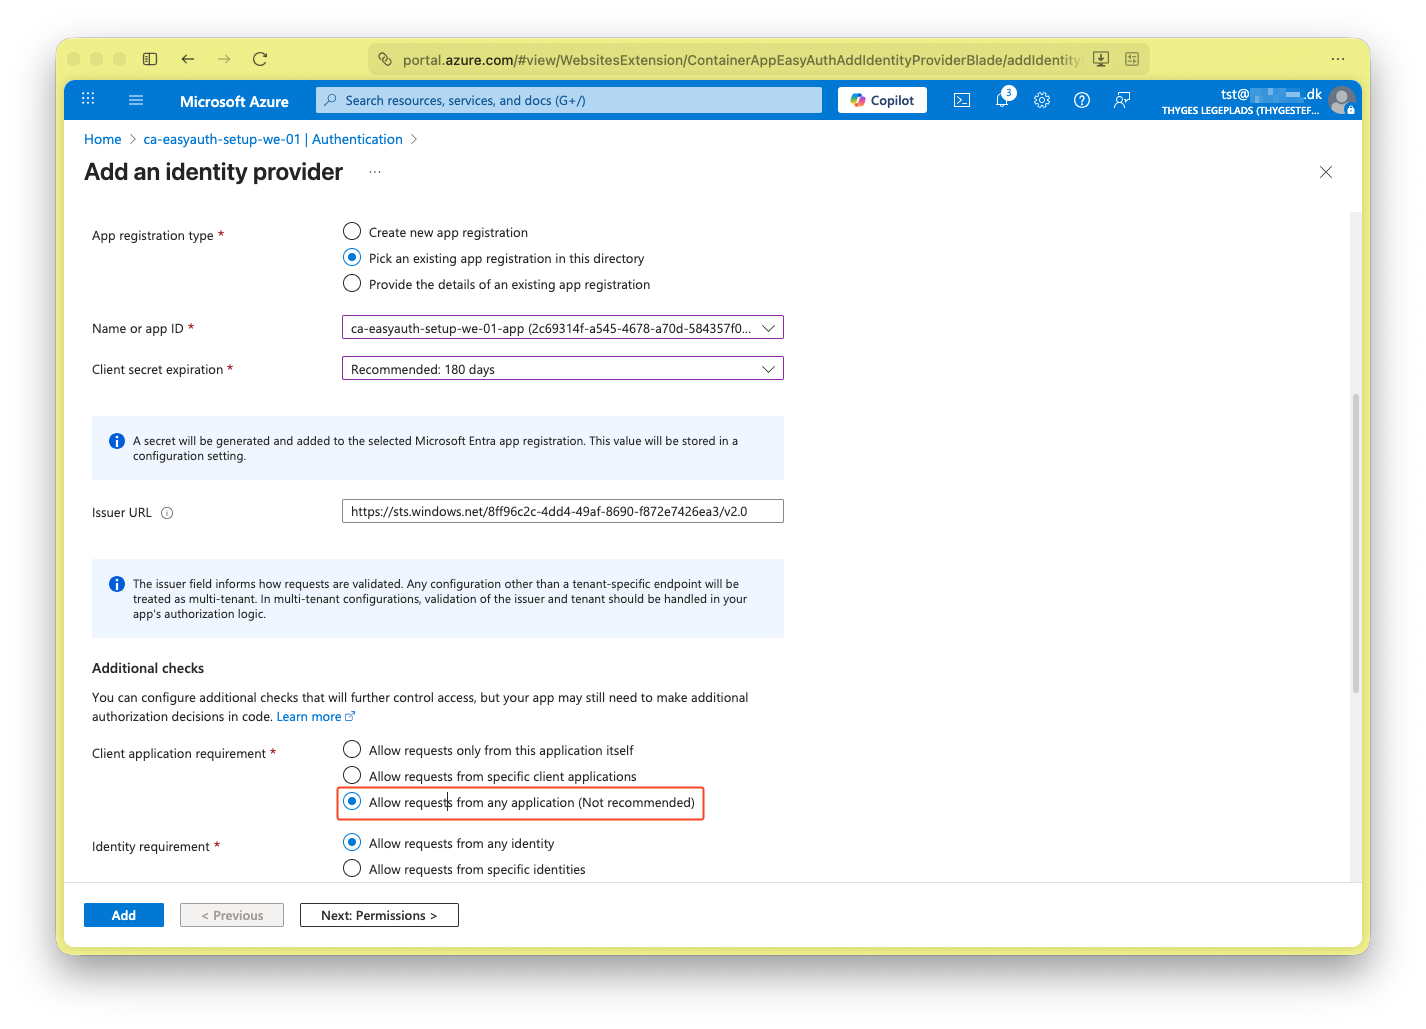
- Add ‘Add identity provider’ and select ‘Microsoft’ as the ‘Identity provider’.
- Select ‘Pick an existing app registration in this directory’ and select expiry.
- Enable ‘Allow requests from any application (Not recommended)’. This is okay, because we enabled ‘Assignment required?’ in the ‘Enterprise Application’.
- Save and edit to set audience which is the ‘Application ID’ under ‘Mange > Expose an API’ from above (Yes… according the documentation this should be a default, but it need to be explicit…).
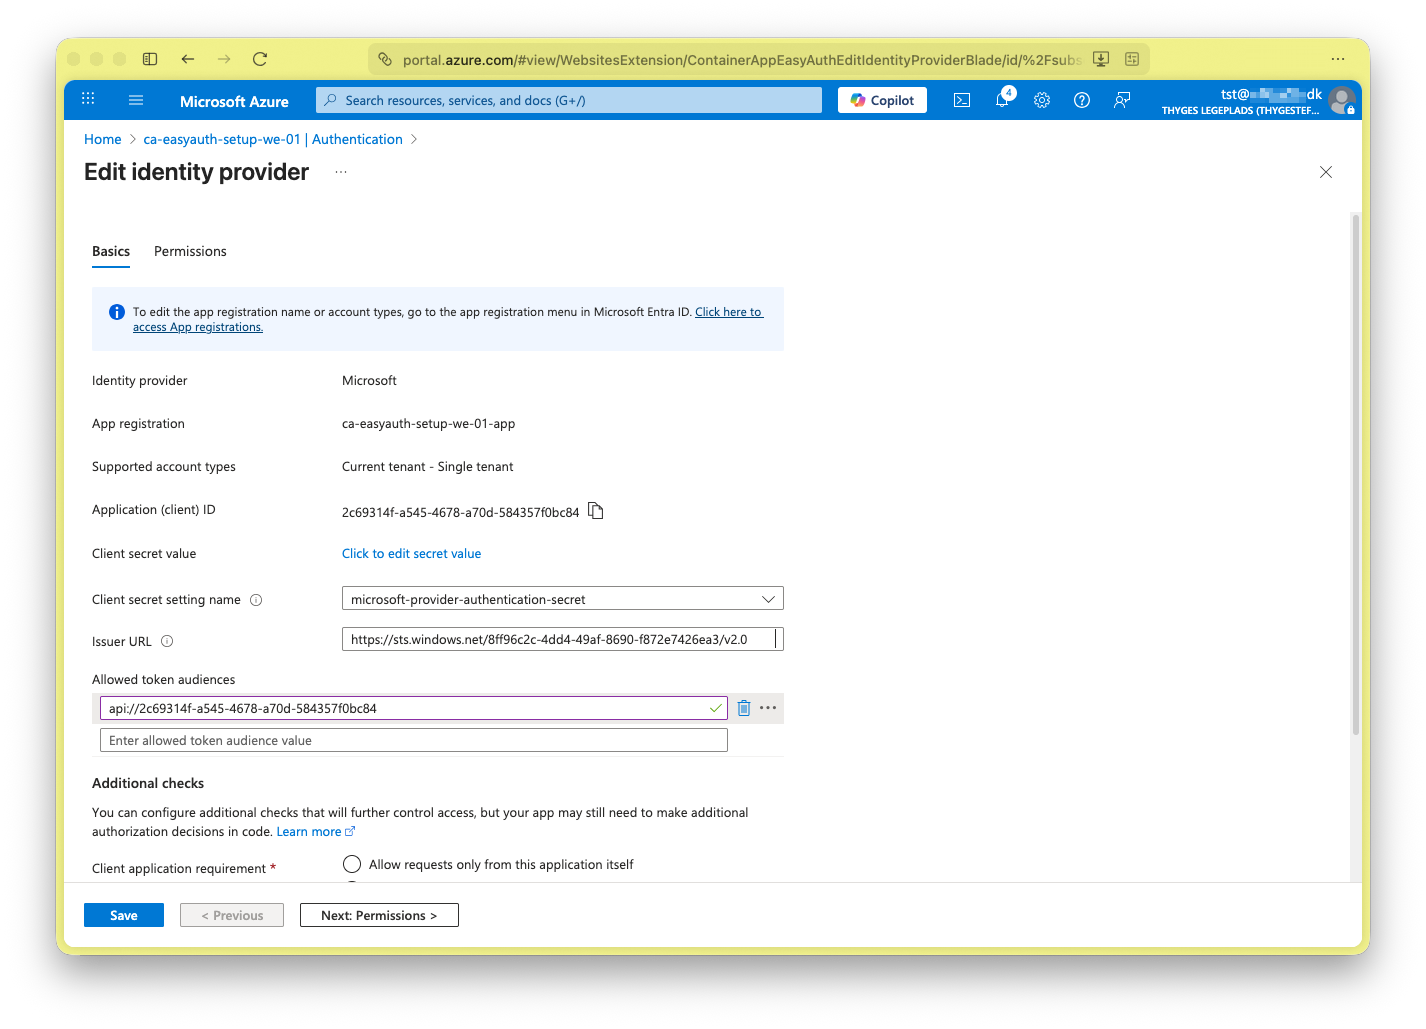
- Press ‘Add’ and wait - now neither a User or Application can access the Container App.
Now we get this output from running the previous console app:
$ dotnet run
Unauthorized
That’s good - we also get a log-in screen when accessing the web-page.
Give access to Users
- Go to the ‘Container App’s ‘Enterpise Application and add a user or group under ‘Manage > Users and groups’.
Give access to Applications
- Create a new ‘App Registration’ representing the daemon application.
- Go to ‘Mange > API Permissions’ and press ‘Add a permission’ and assign the Container App App registrion role (It’s hidden under ‘APIs my organization uses’).
Select ‘Application permissions’ and select ‘Api.Access’
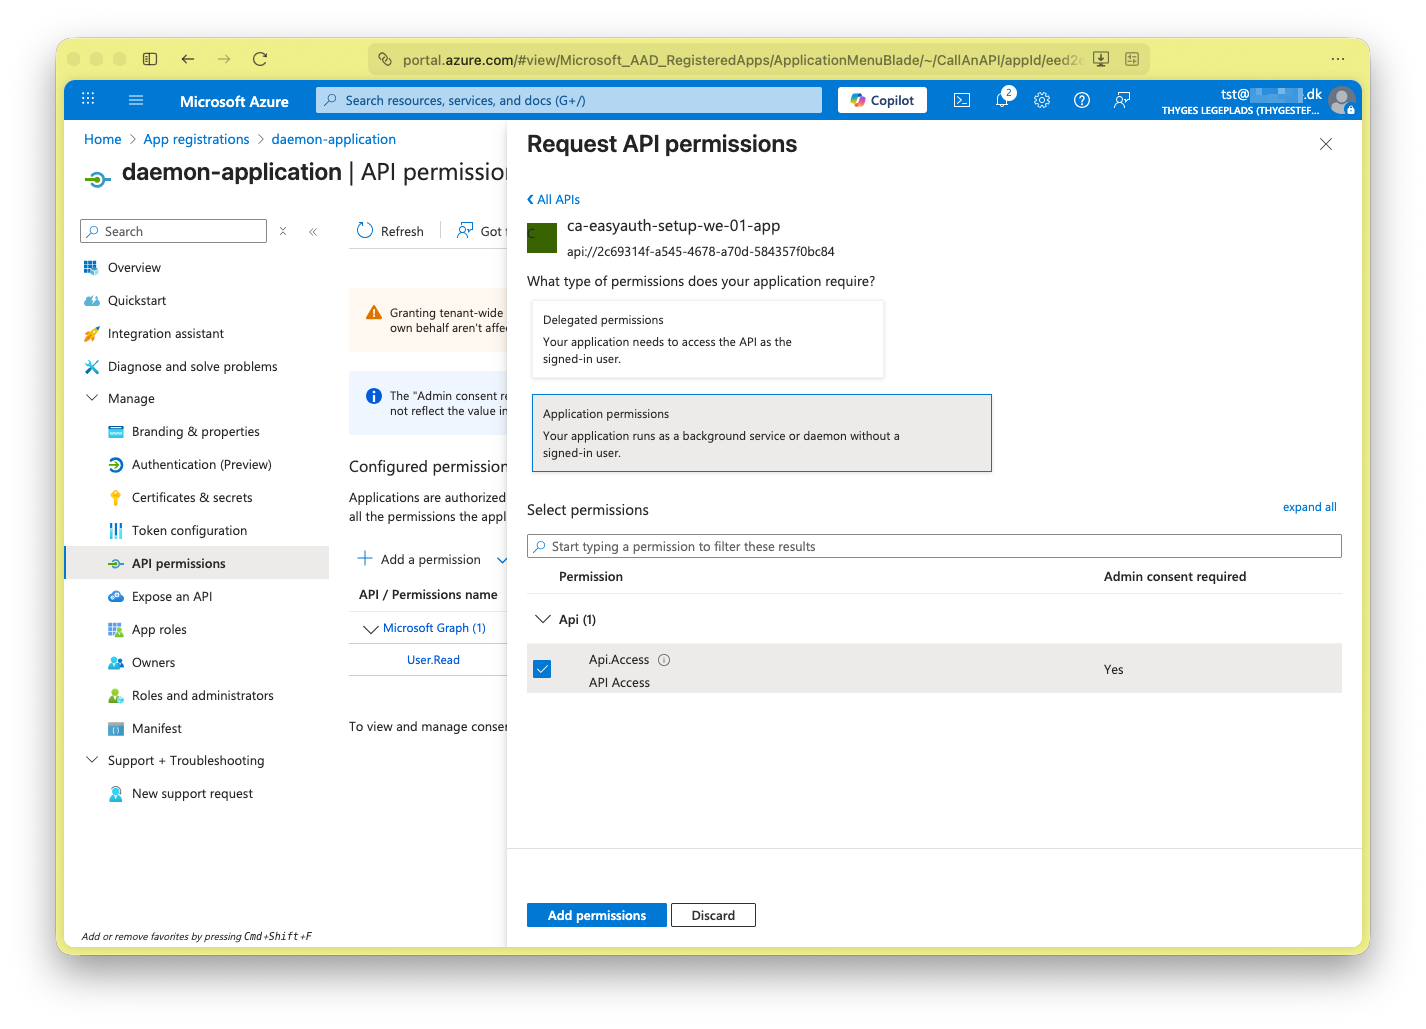
- Grant permission.
- Get details to get a token using the App Registration.
Now using the below simple console app:
// From 'Azure.Identity' NuGet package
var provider = new ClientSecretCredential(
    tenantId: "8ff96c2c-****-****-****-************",
    clientId: "eed2eb09-5d39-4ff6-a214-f6ff72be5d87",
    clientSecret: "****************************************");

var token = provider.GetToken(new TokenRequestContext(["api://2c69314f-a545-4678-a70d-584357f0bc84/.default"])).Token;

var httpClient = new HttpClient();
httpClient.DefaultRequestHeaders.Authorization =
    new AuthenticationHeaderValue("Bearer", token);

var resp  = await httpClient.GetAsync("https://ca-easyauth-setup-we-01.whitecoast-ef2c042a.westeurope.azurecontainerapps.io/");
Console.WriteLine(resp.StatusCode);
will yeild:
$ dotnet run
OK
Recap
Now, we have enabled authentication for our Container App, and explicit grant access to users or applicaitons.
Gotcha
- Not enabling ‘Assignment required?’ will make all users in the tenant able to access the app.
- Enabling ‘Allow requests from any application (Not recommended)’ will make any application in the tenant access the Container App, if ‘Assignment required?’ is not enabled.
- Some would argue that this is “more” fragile than a coded approach. Because, this can be “disabled” by ill-configuring the ‘Container App’ or the ‘Enterprise Application’ whereas the coded approach most likely will go through a pull request.
Please create an issue if you have a comment - and then I'll know I have to prioritize comment functionality